Camera Grid

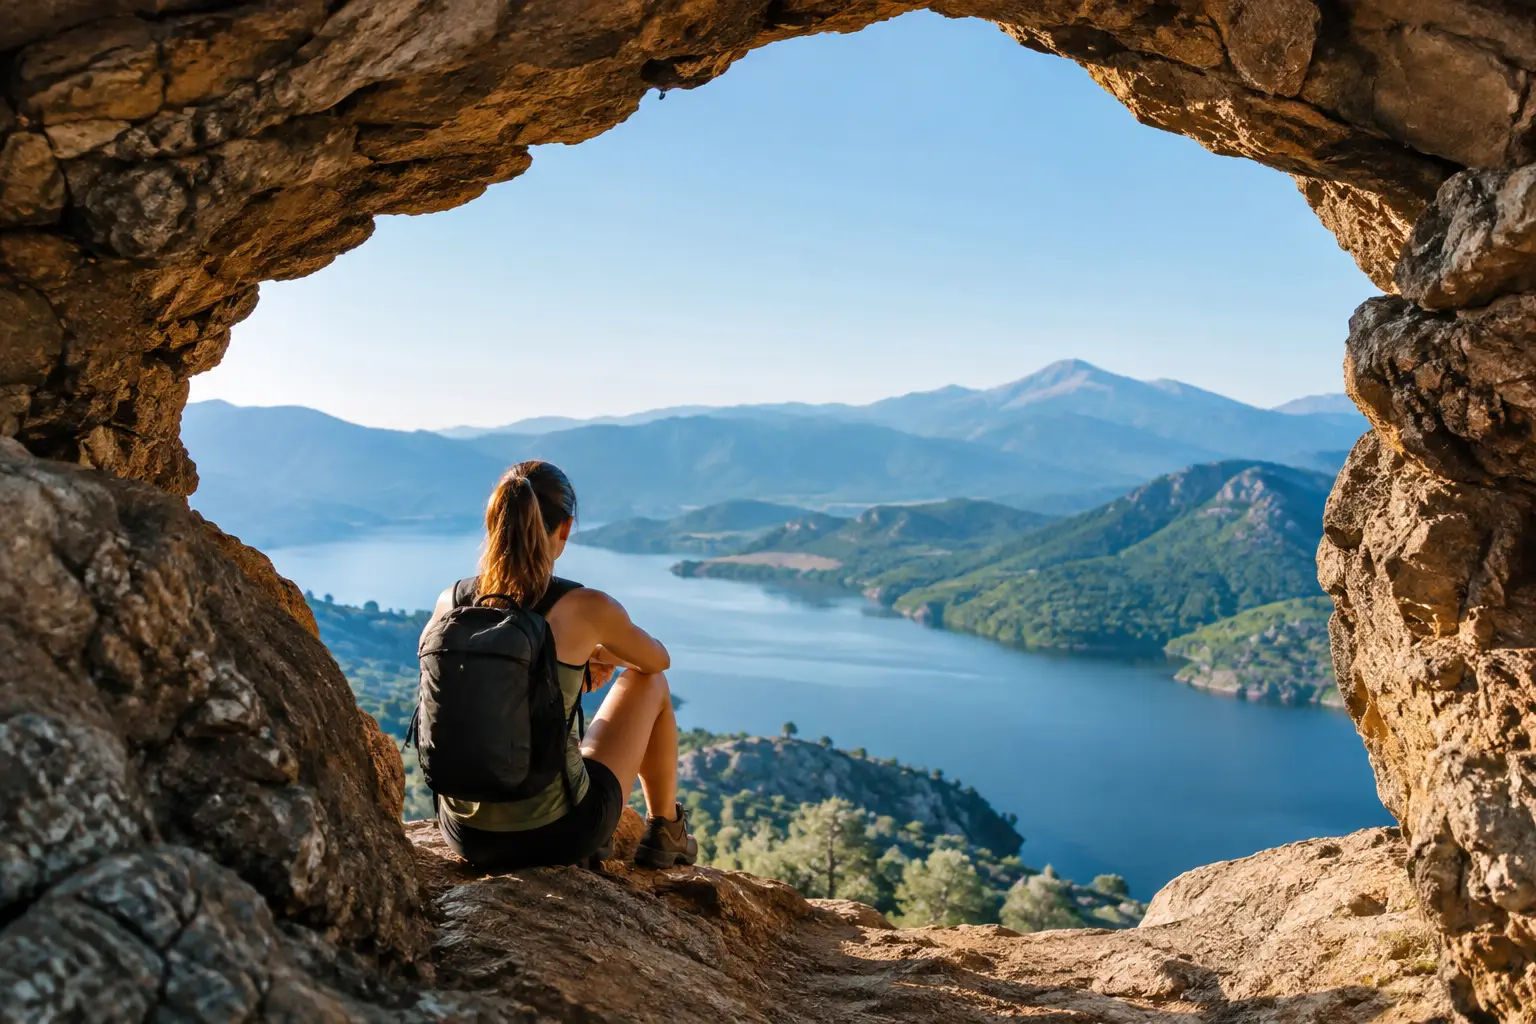
A doorway can do more for a portrait than another filter ever will. Natural framing photography examples show why: when you place a subject inside an opening, beneath an arch, or between two foreground objects, the viewer knows exactly where to look. The scene gains depth. The subject gains presence.
Natural frames are already in front of you. Your job is to recognize the edge, position the phone, and keep that edge from becoming visual clutter. A frame should guide attention inward, not compete for it.
What Natural Framing Does
Natural framing uses elements already in a scene to create a boundary around your subject. It may be literal, such as a window or doorway. It may be partial, such as tree branches entering from two corners. In both cases, the frame creates a path for the eye.
This technique is especially useful on an iPhone because wide-angle phone cameras often include more of the environment than you intend. A strong foreground frame organizes that extra visual information. It gives the image a front, middle, and back.
Do not force every scene into a frame. A clean horizon, a graphic wall, or a symmetrical building may be stronger without one. Use natural framing when the surroundings add context or depth, and leave it alone when the edges distract from the subject.
Natural Framing Photography Examples in Real Scenes
1. A portrait in a doorway
Place your subject a few steps inside a doorway, garage opening, or covered walkway. Stand outside and use the darker edges of the opening to contain the brighter face and clothing within it.
Keep the person away from the exact center if the setting has directional light or a stronger background on one side. Pan slightly until one vertical edge feels heavier than the other, then balance it with the subject’s position. If both sides are equally strong, centered composition can work well.
Watch the top edge. A low doorframe can look like it is pressing down on a person’s head. Tilt up slightly, step back, or ask the subject to move deeper into the opening. Leave intentional space above them.
2. A child framed by playground equipment
At a playground, slide rails, climbing structures, and tunnel openings offer ready-made frames. Shoot through the structure rather than from beside it. The metal or plastic becomes foreground, while the child remains the clear point of focus.
This works best when the frame has a simple shape. A circular tunnel gives a direct, graphic result. Two diagonal rails can also work, but only if they point toward the child rather than crossing their face. Lower the phone to the child’s eye level. It makes the scene feel observed from within their world, not recorded from above.
Move first. Do not try to repair a messy frame by cropping later. One step to the left can remove a distracting bar from the face and turn random equipment into clean leading edges.
3. A travel scene through an arch or window
An arch does two jobs at once. It gives the photograph a strong outline and introduces the destination beyond it. Use it for a city skyline, a church courtyard, a beach view, or a mountain valley.
Expose for the view, then check the inside of the arch. Deep shadow is often useful because it simplifies the foreground. But if the arch becomes a featureless black hole, bring it closer to the edge of the frame or tap the brighter scene and reduce exposure only enough to retain the atmosphere.
Windows require a different decision. If reflections on the glass are distracting, press the phone close to the pane and shade the lens with your hand. If the reflections reveal the location or create a layered story, keep them. It depends on whether the glass adds meaning or simply blocks the view.
4. A food photograph through the table setting
Natural framing is not limited to architecture and landscapes. At a restaurant or kitchen table, use a napkin edge, a glass, chopsticks, or a small plate in the foreground to direct attention toward the main dish.
Do not build a ring of objects around the food. That looks staged and leaves no visual breathing room. Instead, let one or two elements enter from the lower corners. Keep the hero dish unobstructed and use the foreground at a slight angle.
For overhead photos, framing is more subtle. A folded napkin in one corner and a drink at the opposite edge can create balance without enclosing the plate. For a lower angle, a glass close to the lens can become a soft, translucent edge. Check that the autofocus stays on the food, not on the foreground object.
5. A landscape between trees
Two tree trunks at the edges of a trail can frame a distant lake, sunrise, or hiker. The key is separation. If the trees overlap the subject, the frame becomes a blockage. Spread the trunks apart by changing your position, then place the distant subject in the opening.
Branches work best when they enter from the top and corners with a clear gap in the center. Avoid small twigs cutting across bright sky in every direction. They create noise, especially in a wide phone image.
Use the frame to establish scale. A small person on a path, held between large trees, tells the viewer how vast the location feels. Keep the horizon level. A tilted landscape can make even a strong natural frame feel accidental.
6. A building viewed through another building
In cities, look for passages, columns, gates, and the shadowed sides of buildings. Frame a bright facade or a landmark through the darker structure in front of you. This separates the subject from a busy street and gives flat architecture more depth.
Straight lines matter here. Hold the phone level and avoid tilting it upward unless you want converging verticals as part of the design. If the composition relies on symmetry, center the opening precisely. If it relies on a diagonal passage or row of columns, let those lines pull toward the subject.
A narrow opening often benefits from stepping back. Wider phone lenses exaggerate nearby edges, so moving back can make columns and doorways feel less distorted. Use zoom only when it improves the relationship between the frame and the subject, not just because the subject seems far away.
Build the Frame Before You Shoot
Natural framing is a positioning technique, not a post-processing trick. Start by identifying the subject. Then look around the edges of the viewfinder for an opening, a pair of objects, or a foreground shape that can point inward.
Keep these checks quick:
- Make sure the frame does not cover a face, key detail, or horizon.
- Look for a visible gap between the frame and the subject.
- Simplify the background before adding more foreground.
- Check the corners. Small bright objects at the edge pull attention away.
A frame can be incomplete. In fact, partial frames usually feel more natural than a perfect rectangle. A leaf in the upper corner, a blurred shoulder at the side, and a railing below may be enough to establish depth.
Camera Grid can help at this stage by reading the scene and placing an appropriate composition guide in the live viewfinder. Use its framing score as feedback, not permission. If the natural edges improve the subject’s position, hold still and capture. If the overlay reveals that the subject is cramped, step back or pan until the frame has room to work.
When Natural Frames Fail
The most common problem is visual weight. Dark, close foreground objects can overpower a small or softly lit subject. If you notice your eye landing on the doorway, branch, or rail before the person or place inside it, reduce the frame. Shift sideways, raise the phone, or crop the foreground out by moving closer to the subject.
The second problem is false framing. Two unrelated objects at the edges do not automatically create structure. They need to support the same direction of attention. If one edge points in and the other points away, the image feels split.
Also consider the story. A window frame makes sense for a quiet travel view or a person looking outside. It may feel unnecessary for a fast street scene where directness is the point. Composition should clarify the photograph, not announce the technique.
The next time you see a doorway, a canopy of branches, or the open space between two buildings, do not just photograph through it. Pause. Move until the edges lead inward. Frame it. Lock it.