Camera Grid
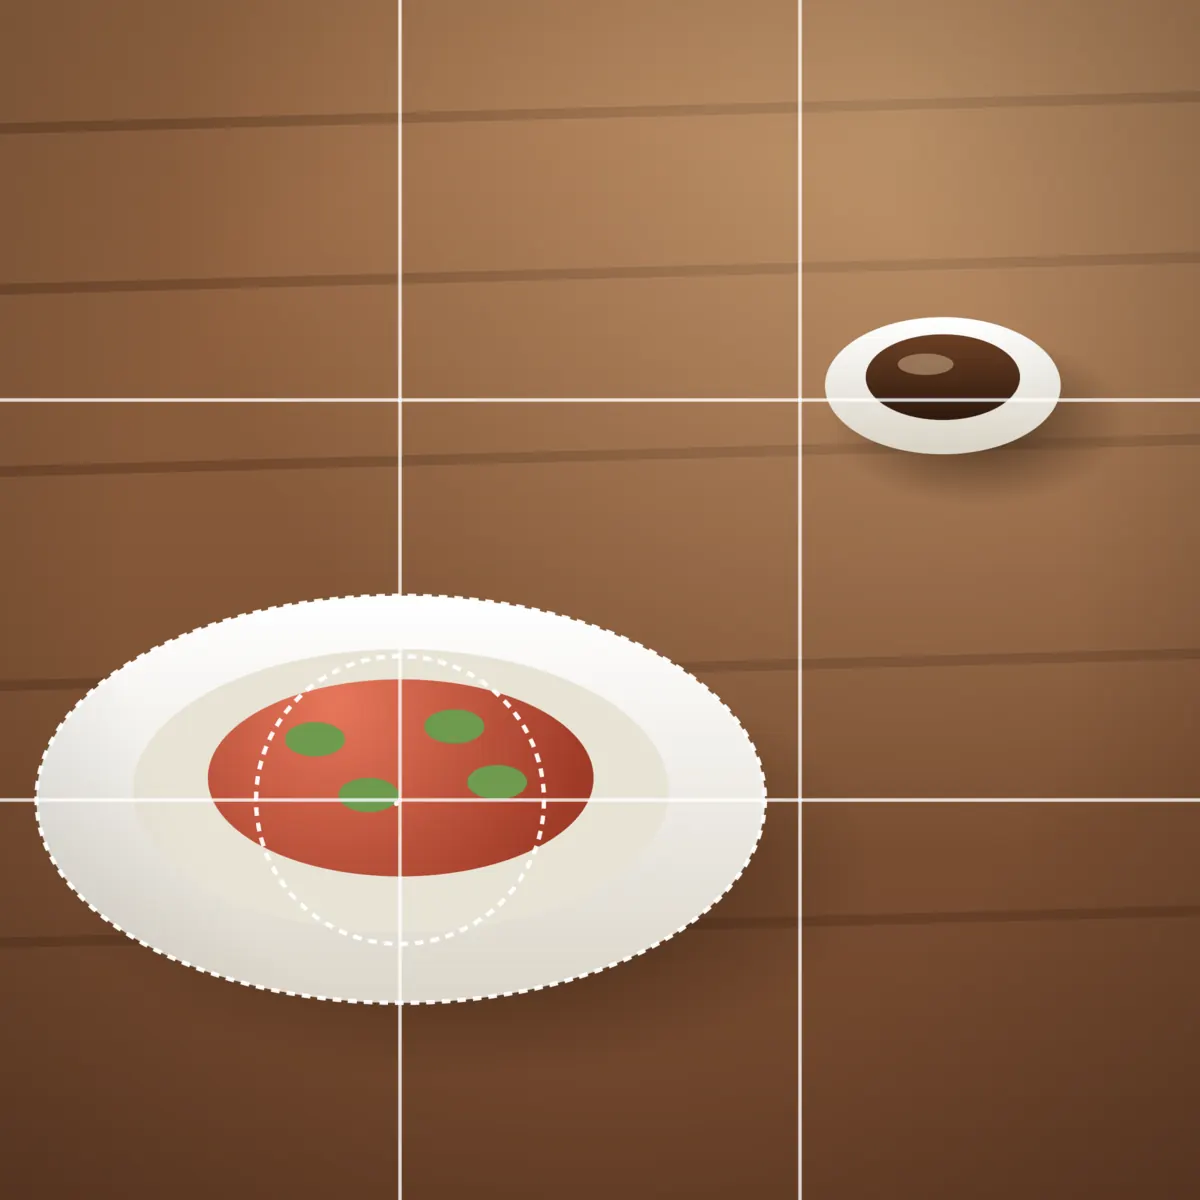
To shoot food at 45° on an iPhone, stand over the table and tip the phone down until you see the front of the plate and a little of its top, about halfway between eye level and straight down. Zoom in to about 2× instead of leaning close, put the plate on a third, and keep a soft side light coming from a window. The angle shows height and texture at the same time: the layers of a burger, the rim of a bowl, the foam on a coffee. Use straight down instead when the food is flat and the pattern on the table is the picture. This guide covers both angles, the light, and how to place the plate.
Why 45° works for food
Food has two kinds of interest. Some dishes are about height: a stack of pancakes, a sandwich, a tall glass. Others are about layout: a pizza, a salad in a wide bowl, a board of small things. A 45° view shows a bit of both. You see the top, so the arrangement reads, and you see the side, so the height reads.
It is also the angle a person at the table sees. That makes a 45° photo feel like a seat at the meal.
When to go straight down instead
Shoot from directly above when the dish is flat or when the arrangement is the subject: a spread of plates, a pizza, a breakfast tray, a flat lay of ingredients. From above the plate becomes a circle and the table becomes a background shape. Put the main plate in the middle, or build a pattern around it. The Aerial guide is made for this view.
Getting the angle right
- Stand, do not sit. Sitting puts the phone too close to the table’s level. Standing gives you room to tip down.
- Tip the phone about halfway. Straight ahead is 0°, straight down is 90°. Aim for the middle. You will see the front edge of the plate and its top surface.
- Zoom in instead of leaning in. At 0.5× or 1× up close, the near side of the plate stretches and the far side shrinks. Step back and use 2× or so. The plate keeps its shape and the background falls further out of focus.
- Keep the phone level side to side. A tilted table edge looks like a spill waiting to happen.
Placing the plate
The plate on a third
At 45°, put the main plate on a third and let the rest of the table fill the other side: a glass, a napkin, a second dish out of focus. This gives the photo depth and a sense of the meal around the plate. Put the plate on a lower crossing if the table in front is plain, and on an upper crossing if you want the foreground to carry a hand or a fork.
The table edge
The far edge of the table, or the edge of a board, is a strong line at this angle. Keep it level and keep it out of the middle of the frame. Behind the plate is a good place for it, where it separates the food from the room.
More than one plate
Two plates read well on opposite corners of the frame, so the eye moves between them. Three read well as a triangle. Leave a little space between them so each one has its own outline.
Light for food
- Use a window. Daylight from the side is the easiest good light for food. Put the window to the left or right of the plate, or a little behind it.
- Turn off the room lights. Mixed daylight and warm bulbs gives the food two colours at once.
- Soften hard sun. If the sun falls straight on the table, a sheet of baking paper or a thin curtain softens it.
- Fill the shadow side. A white napkin or a menu held opposite the window lifts the dark side of the plate.
- Light from behind shows shine. Sauces, soups and drinks glow when the light comes from behind them. Watch for glare on the plate.
- Avoid the flash. It flattens food and puts a hot spot on anything glossy.
Small things that make a difference
- Clean the rim. A smear on the plate’s edge is the first thing the eye finds.
- Turn the plate. Most dishes have a best side. Turn the plate until the tallest or most colourful part faces you.
- Shoot quickly. Steam, foam and melting things change within a minute or two.
- Tap to focus on the front of the food. At 45° the depth of field is shallow at 2×. Put the sharp point on the part that matters.
- Drag exposure down slightly. A touch darker usually keeps highlights on white plates from burning out.
A live guide at the table
Camera Grid reads the phone’s tilt and the scene, offers Table-Top 45° when you look down at a table and Aerial when you point straight down, and draws where the plate should go. When the camera finds the plate’s rim or the table’s edge, it draws that edge behind the subject too. When it cannot find one, it shows only a dashed suggestion. The ring around the shutter scores the angle and the placement, and the coach says one thing at a time, such as a tilt.
Checklist
- Stand, and tip the phone about halfway between level and straight down.
- Step back and zoom to around 2× rather than leaning in.
- Main plate on a third, with a glass or second dish on the other side.
- Table edge level, behind the plate, out of the middle.
- Soft window light from the side; room lights off; no flash.
- Flat dishes and spreads: go straight down and centre the plate.